Table of Contents:
Introduction: The Importance of Knot Tying in Fishing
Setting out on an angling adventure means packing the right gear, practicing patience and, perhaps most importantly, mastering the art of tying an effective fishing knot. A good knot secures your catch and could mean the difference between bringing home a trophy or leaving empty-handed.
Ask any seasoned angler and they will tell you that knot tying ranks among the essential skills in their fishing arsenal. Why is that so? A good knot not only secures your terminal tackle (things like hooks, sinkers, or swivels) to your fishing line but can survive the struggles of a big fish, the corrosive effects of saltwater, or the abrasive resistance of rocky river bottoms.
That’s why at Buzzerfish, we believe in the power of information and learning and endeavour to provide our readers with easy-to-understand, practical guides that facilitate your fishing journeys. This article focuses on presenting you with a comprehensive guide to mastering essential fishing knots. Regardless of whether you're a seasoned pro or a newbie angler, you will find this guide extremely useful.
The Basics of Knot Tying
When it comes to knot tying, understanding the basics is vital. Several factors make a knot secure and reliable. First, consider the type of line you're using. Different types come with various handling characteristics requiring specific knots.
Secondly, examine the usage of your knot. Knots tie hooks to the line, secure the line to the reel, and connect lines among other functions. Hence, target your knot to the specific task at hand.
Finally, practice makes perfect. Regular practice is essential to master the skill of knot tying. Practice until you can tie these knots quickly and neatly, even in poor light or wet conditions.
With these basics in mind, you're ready to begin mastering the techniques behind essential fishing knots. So, let's dive deeper into understanding specific fishing knots that can make your next trip a success.
Pros and Cons of Mastering Essential Fishing Knots
| Pros | Cons |
|---|---|
| Enhances fishing skills | Can be difficult to learn |
| Increases chances of a successful catch | Requires time to practice |
| Adds versatility to fishing techniques | May be unnecessary with modern fishing gear |
| Shows commitment and dedication to the craft | Can lead to frustration if not perfected |
Types of Fishing Knots: An Overview

There exist countless knots, but only a few became popular in fishing. So, which knots are termed as essential? Each knot serves a unique function, and knowing when to use each can significantly improve your fishing efficiency. Let's go over some of the most common types of knots used in fishing.
The Clinch Knot: One of the most universally used fishing knots, the Clinch knot, is known for its ease of tying and versatility. It's particularly great for hooking bait, lures, or swivels to your line.
The Palomar Knot: Known for its strength and simplicity, the Palomar knot is ideal when you need to tie your line to a hook or a swivel. It thrives with braided or monofilament lines.
The Blood Knot: Want to join two sections of line together? The Blood Knot is your best bet. It's compact, smooth, and excellent for creating dropper lines or lengthening leader sections.
Beyond these, there are ones like Surgeon's Knot, Double Uni Knot, Albright Knot and many more that could prove helpful in different scenarios. Knowing about these knots and when to apply them is just the first step. To truly master the art of knot tying for fishing, let's dive into how to tie each of these knots.
Step by Step Guide to Tying Essential Fishing Knots
In this section, we'll provide step by step instructions for tying the most important fishing knots. Ready to learn? Let's dive in!
The Clinch Knot

The Clinch knot tops our list because of its popular use. Here's how to tie it:
First, thread the end of the line through the eye of the hook. Then, twist the line about five to seven times. Insert the end of the line back through the loop closest to the eye of the hook. Now, pass the end of the line through the big loop you just made. Finally, wet the knot and tighten it by pulling on both ends of the line. Voila! You have tied a Clinch knot.
The Palomar Knot
Next, we have the Palomar knot. Follow these steps:
Double about six inches of the line and pass the end of the loop through the hook's eye. Then, tie a loose overhand knot with the hook dangling from the bottom. Pass the loop over the end of the hook. Lastly, pull on the line while holding the loose end of the loop between thumb and forefinger. Tighten the knot and you’re all set.
The Blood Knot

Lastly, we got the Blood knot. Here’s how:
Overlap the ends of two lines parallel to each other for about 6 inches. Twist one line around the other at least five times. Then repeat by twisting the other line around the first, the same number of times. Finally, pull the lines in opposite directions and voila, you have now tied the Blood knot.
Remember, practice makes perfect. So keep practicing these knots until they become second nature—your fishing trips will be much more successful for it!
Knot Tying Tools and Tips
No matter how seasoned an angler you are, having the right tools and tips at your disposal makes knot tying much easier. While you may think only your hands are needed, there are tools available that aim to simplify the process. Here are some valuable tips and tools one should consider:
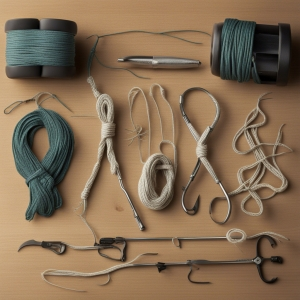
Knot Tying Tools: There are several tools available that can help you tie fishing knots. These range from multi-tool options, which include line clippers and knot tying guides, to simpler, single-function tools dedicated exclusively to knot tying. Some well-respected knot-tying tools include 'Tie-Fast', 'Hook-Eze', and 'SF Knot Tying Tool'. Go for the one that suits your style and needs.
Use Lubrication: When you're tightening your knot, it's always a good idea to lubricate it first with a bit of spit or water. This reduces friction, which can cause the line to weaken, and also enables the knot to tighten more fully for optimal strength.
Test Your Knots: Once your knot is tied, give it a tug to ensure it's secure. It's much better to have a knot break during your test tug rather than when you've hooked a fish!
Practice Regularly: Practice makes perfect is a saying that holds true for knot tying. The more often you practice tying your knots, the easier it will become, ensuring you can quickly and efficiently secure your line when out on the water.
A solid grasp of knot tying will skyrocket your efficiency and success on the water. Make sure these tips become practiced habits and remember that tools aren't cheats — they're just aids to make fishing more enjoyable.
Conclusion: Mastering the Art of Knot Tying in Fishing
Attaining proficiency in knot tying is a valuable skill that can elevate your fishing experience. By taking the time to learn and practice a variety of essential fishing knots, you enhance the chances of a successful catch.
Even a simple knot, when tied correctly, can ensure the longevity of your gear and provide stability in unforeseen fishing conditions. Going forward, remember this: your fishing line is only as mighty as the knot that ties it together. So whether you choose to implement the Clinch knot, the Palomar knot or the Blood knot, ensure you've practiced enough to seal it tight. Here's to your next big catch, thanks to the mighty art of knot tying!
Essentials of Knot Tying for Fishing
What is the importance of knot tying in fishing?
Knot tying is essential in fishing as it secures the hook to the fishing line. The proper knot can ensure that the fish does not swim away with your bait or lead to the loss of the fish even when it's caught.
What are the most common fishing knots?
Some of the most common fishing knots include the Clinch Knot, the Palomar Knot, and the Blood Knot. Each knot serves a specific purpose and is used in different fishing scenarios.
How to tie a Clinch Knot?
Pass the line through the hook's eye, twist it around the standing line about five times. Then pass the loose end back through the original loop near the eye, then through the larger loop you just created. Finally, pull it tight.
How to tie a Palomar Knot?
Double over the line and push the loop through the hook's eye. Tie a loose overhand knot with the hook hanging from the bottom. Holding the overhand knot between your thumb and forefinger, pass the loop of line over the hook. Slide the loop above the eye of the hook, and then pull on both the standing line and tag end to tighten the knot.
How to tie a Blood Knot?
Line up the ends of each line for several inches, then wrap the first line around the second at least five times. Wrap the second around the first at least five times, and bring both loose ends back to the middle between the two lines. Pull tight to close the knot.


